
Want to give your portraits the polished, professional look seen in world-class photography? Magnum’s editing style is renowned for its storytelling depth, subtle retouching, and emotional impact. In this guide, we’ll break down 10 powerful skin retouching techniques and expert portrait editing tips that can instantly elevate your images. Whether you’re editing headshots, fashion portraits, or lifestyle images, these proven methods will help you achieve gallery-worthy results—without over-editing or losing authenticity.
1. Frequency Separation: The Foundation of Flawless Skin
What It Does:
Separates texture from tone, allowing you to clean up blemishes and uneven tones without destroying natural skin texture.
Why It Works:
This is a must-have in any skin retouching workflow. It provides control and preserves realism.
Portrait Editing Tip:
Use low-opacity tools for subtle corrections and avoid removing natural features like pores or fine lines.
2. Dodge and Burn: Sculpt with Light
What It Does:
Dodge (lighten) and burn (darken) to enhance facial structure and guide viewer focus.
Why It Works:
This technique adds drama and dimension while maintaining skin detail.
Skin Retouching Technique:
Apply dodge and burn on a 50% gray layer set to Soft Light and use a soft brush for smooth transitions.
3. Natural Skin Smoothing Without Blur
What It Does:
Softens skin tones while keeping texture intact.
Why It Works:
Too much blurring looks artificial. This technique maintains the integrity of the skin.
Portrait Editing Tip:
Try a subtle Gaussian blur on a duplicate layer, then add a high-pass filter to reintroduce fine texture.
4. Color Correction for Clean Skin Tones
What It Does:
Eliminates unwanted color casts and enhances the natural complexion.
Why It Works:
Accurate skin color makes the portrait feel more lifelike and emotionally resonant.
Skin Retouching Tip:
Use Selective Color or Curves to target reds, yellows, and blues in the skin for precise control.
5. Contrast Control for Facial Depth
What It Does:
Enhances the dynamic range to bring more visual interest and detail to the face.
Why It Works:
Well-balanced contrast makes a portrait look sharp and professional.
Portrait Editing Tip:
Use adjustment layers with layer masks to control where contrast is applied.
6. Background Blur to Direct Attention
What It Does:
Softens busy or distracting backgrounds so the focus remains on the subject.
Why It Works:
This mimics the effect of a wide-aperture lens and enhances storytelling.
Portrait Editing Tip:
Use Lens Blur or Field Blur in Photoshop, and mask carefully around hair for realism.
7. Tone Matching Across a Series
What It Does:
Ensures all portraits in a collection have consistent color and lighting.
Why It Works:
This is crucial for brand shoots or portfolios where cohesion is key.
Skin Retouching Technique:
Use Gradient Maps, LUTs, or adjustment layers copied across files to maintain tone consistency.
8. Texture Preservation for Realism
What It Does:
Maintains natural details like pores and wrinkles while removing imperfections.
Why It Works:
Over-retouching removes personality. Magnum-inspired edits aim to refine, not erase.
Portrait Editing Tip:
Always zoom to 100% while editing and toggle layers on/off frequently to check realism.
9. Sharpening Key Features
What It Does:
Enhances focus points like eyes, lips, and eyebrows.
Why It Works:
Subtle sharpening draws attention to the most expressive parts of the face.
Skin Retouching Technique:
Apply a High Pass filter on a duplicate layer set to Overlay or Soft Light, then mask out areas that shouldn’t be sharpened (like smooth skin).
10. Final Grading for Mood and Cohesion
What It Does:
Adds a cohesive visual style and emotion through color grading.
Why It Works:
Final grading transforms a clean edit into a cinematic, emotionally charged image.
Portrait Editing Tip:
Use Selective Color, Color Lookup Tables (LUTs), or Gradient Maps for advanced tonal control.
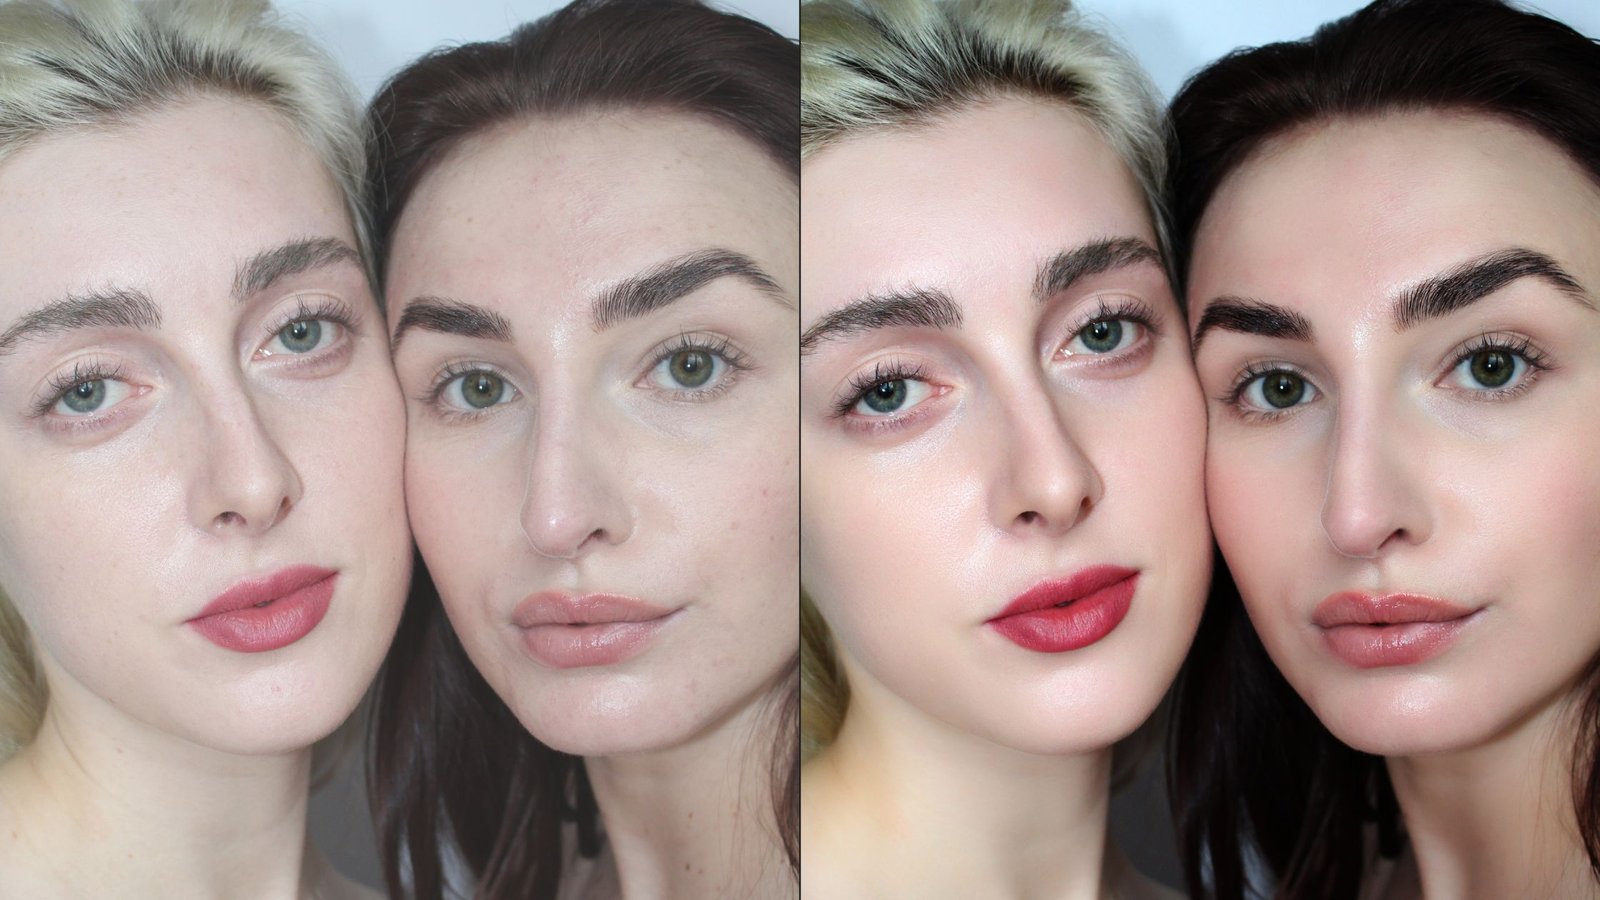
Before and After Example Suggestion:
Before: A flat portrait with uneven skin tone, visible blemishes, and a cluttered background.
After: Evened skin tone, refined features, enhanced lighting, background blur, and a polished color grade—creating a timeless, professional look.
✅ Conclusion: Master the Magnum Approach to Portrait Editing
The key to stunning portraits isn’t just about removing flaws—it’s about enhancing emotion, preserving authenticity, and guiding the viewer’s eye. These portrait editing tips and skin retouching techniques inspired by Magnum’s approach can transform your work from standard to striking.
By mastering these 10 essential techniques, you’ll not only polish your portraits—you’ll tell richer, more powerful visual stories that connect with your audience.